Chapter 9
Networking Tools
9.1.1 Assumed Knowledge
9.1.2 Linux and Network Setup
9.2 Operating Systems and Tool Interfaces
9.3 Viewing and Changing Network Interface Information
9.3.1 Viewing Interface Information
9.3.2 Changing Interface Information
9.4 Viewing Ethernet Interface Details
9.5 Testing Network Connectivity
9.6 Testing a Route
9.7 Converting Between Domain Names and IP Addresses
9.8 Viewing the Routing Table
9.9 Converting IP Addresses to Hardware Addresses
9.10 Network Statistics
9.11 Useful Networking Files
9.11.1 /etc/hostname
9.11.2 /etc/hosts
9.11.3 /etc/resolv.conf
9.11.4 /etc/network/interfaces
9.11.5 /etc/services
9.11.6 /etc/protocols
9.11.7 /etc/sysctl.conf
9.12 Application and Performance Testing
9.12.1 Generic Application Testing with netcat
9.12.2 Traffic Monitoring with iptraf
9.12.3 Internet Performance Measurements with iperf
9.12.4 Packet Drops and Delays with tc
File: nsl/networking.tex, r1670
This chapter will introduce you to important software tools for managing computer networks. The tools will be used in other chapters, so unless you know them already, you are advised to complete this chapter before reading other (networking-related) chapters.
9.1 Prerequisites
9.1.1 Assumed Knowledge
This chapter assumes you have knowledge of:
- Computer networking concepts, including layering, protocols, LANs, Wide Area Networks (WANs) and internetworking.
- Computer hardware and software organisation, including operating system concepts and network devices.
- Ethernet, including frame formats, Medium Access Control (MAC) addresses and switches.
- IP networking, including IP addresses, forwarding and routing.
- Addressing and address mapping, including Address Resolution Protocol (ARP) and DNS.
- Network protocols, including TCP, IP and User Datagram Protocol (UDP).
Basic Linux command line skills, as covered in Chapter 4, are assumed. You will need to be able to:
- View and edit files, e.g. with cat or nano.
- Perform operations on directories and files, including ls, cd, cp.
9.1.2 Linux and Network Setup
Most of the practical tasks in this chapter can be completed on a single Linux computer, as long it has connection to the Internet. If you are using virtnet (Chapter 3) then while topology 1 is sufficient, some tasks can be more predictable (not relying on real Internet access) if using a topology with multiple nodes.
The recommended virtnet topology is:
9.2 Operating Systems and Tool Interfaces
When configuring and managing a computer network, or diagnosing problems in a network, you need to use the correct tools for the task. Most often these tools are software applications. There are various tools available on most computers that can be used to support common networking tasks including:
- Viewing and changing the configuration of your computer’s network interface, such as addresses and other protocol parameters.
- Testing your computer’s network connectivity, such as ability to communicate with other computers and statistics of the communication.
- View and analyse traffic sent/received by your computer, as well as other computers on a network.
The tools that can be used to manage the network vary on different operating systems. For example, Microsoft Windows has different programs than Unix variants such as Ubuntu and Apple macOS. (And indeed, the programs may be different between versions: Windows 7 may be different from Windows 10, and Ubuntu Linux different from RedHat Linux). Combined with this, many operating systems will have two different interfaces to the same tool: a GUI and a command line (text) interface.
Although the programs may be different (including interface and options), the majority of them provide similar level of functionality. Therefore once you learn the functionality using one tool, it will not be too hard for you to perform the same functionality in another operating system. This book uses (Ubuntu) Linux and the command line, but you should be able to apply these and similar tools in other operating systems.
9.3 Viewing and Changing Network Interface Information
Your computer connects to the LAN via one of its Network Interface Cards (NICs). Your computer may have multiple NICs. Almost all operating systems allow the user to view information about the current NIC connection, including:
- MAC (or hardware) address
- IP address and subnet mask
- Addresses of other important nodes (servers) on the network
- Traffic sent/received by the NIC
Operating systems often allow administrator users to modify some of the above information as well. The main command to view and edit the network interface information is ifconfig.
9.3.1 Viewing Interface Information
To view the information for all interfaces:
$ ifconfig
The operating system assigns names to each interface, such as eth0 for on Ethernet NIC and eth1 for another. As the name/number assigned to an interface is automatic, you cannot assume the same scheme is used in different computers, nor can you assume it will be the same each time you start the same computer.
The special loopback interface (which isn’t a real physical interface, but a virtual interface implemented in software inside the OS) is often given the name lo.
To view the details of a specific interface, such as eth0:
$ ifconfig eth0
An example on node1 in virtnet:
network@node1:~$ ifconfig eth1
eth1      Link encap:Ethernet  HWaddr 08:00:27:51:52:b4
            inet addr:192.168.1.11  Bcast:192.168.1.255  Mask:255.255.255.0
            inet6 addr: fe80::a00:27ff:fe51:52b4/64 Scope:Link
            UP BROADCAST RUNNING MULTICAST  MTU:1500  Metric:1
            RX packets:0 errors:0 dropped:0 overruns:0 frame:0
            TX packets:7 errors:0 dropped:0 overruns:0 carrier:0
            collisions:0 txqueuelen:1000
            RX bytes:0 (0.0 B)  TX bytes:578 (578.0 B)
From the output we can see:
- Ethernet is the data link layer technology;
- the hardware or MAC address is 08:00:27:51:52:b4;
- the IPv4 address is 192.168.1.11/24;
- the IPv6 address is fe80::a00:27ff:fe51:52b4/64;
- the interface is up;
- various transmit and receive statistics.
And an example on a real interface (not within virtnet). Note that this uses a slightly different output format due to the Linux version on the laptop. Also the interface naming scheme for Ethernet interfaces is different. Here it is enp0s31f6, whereas in virtnet the older style of eth1 is used.
sgordon@laptop:~$ ifconfig
enp0s31f6: flags=4163  mtu 1500
         inet 138.77.176.62  netmask 255.255.255.0  broadcast 138.77.176.255
         inet6 fe80::ac54:c0c4:270b:ce67  prefixlen 64  scopeid 0x20
         ether f8:ca:b8:0d:fc:a1  txqueuelen 1000  (Ethernet)
         RX packets 77  bytes 20037 (20.0 KB)
         RX errors 0  dropped 0  overruns 0  frame 0
         TX packets 101  bytes 16548 (16.5 KB)
         TX errors 0  dropped 0 overruns 0  carrier 0  collisions 0
         device interrupt 16  memory 0xef200000-ef220000

lo: flags=73  mtu 65536
         inet 127.0.0.1  netmask 255.0.0.0
         inet6 ::1  prefixlen 128  scopeid 0x10
         loop  txqueuelen 1000  (Local Loopback)
         RX packets 5759  bytes 653847 (653.8 KB)
         RX errors 0  dropped 0  overruns 0  frame 0
         TX packets 5759  bytes 653847 (653.8 KB)
         TX errors 0  dropped 0 overruns 0  carrier 0  collisions 0
9.3.2 Changing Interface Information
ifconfig can also be used to change network interface information, in particular the IP address. Note that usually sudo is needed to make such changes.
First note that an interface can be either up (on) or down (off). You can change the state using:
$ sudo ifconfig INTERFACE down
$ sudo ifconfig INTERFACE up
The syntax for setting/changing an IP address is:
$ sudo ifconfig INTERFACE IPADDRESS/MASK up
While the “up” is not mandatory at the end, it is good practice to include it just in case the interface was down previously (assuming you do want to use the interface).
The following example shows ¡cmd¿ifconfig¡/cmd¿ being used to change the IP address on node1.
network@node1:~$ ifconfig eth1
eth1      Link encap:Ethernet  HWaddr 08:00:27:51:52:b4
            inet addr:192.168.1.11  Bcast:192.168.1.255  Mask:255.255.255.0
            inet6 addr: fe80::a00:27ff:fe51:52b4/64 Scope:Link
            UP BROADCAST RUNNING MULTICAST  MTU:1500  Metric:1
            RX packets:73 errors:0 dropped:0 overruns:0 frame:0
            TX packets:85 errors:0 dropped:0 overruns:0 carrier:0
            collisions:0 txqueuelen:1000
            RX bytes:33315 (33.3 KB)  TX bytes:15065 (15.0 KB)

network@node1:~$ sudo ifconfig eth1 down
network@node1:~$ ifconfig eth1
eth1      Link encap:Ethernet  HWaddr 08:00:27:51:52:b4
            inet addr:192.168.1.11  Bcast:192.168.1.255  Mask:255.255.255.0
            BROADCAST MULTICAST  MTU:1500  Metric:1
            RX packets:73 errors:0 dropped:0 overruns:0 frame:0
            TX packets:85 errors:0 dropped:0 overruns:0 carrier:0
            collisions:0 txqueuelen:1000
            RX bytes:33315 (33.3 KB)  TX bytes:15065 (15.0 KB)

network@node1:~$ sudo ifconfig eth1 192.168.3.33/24 up
network@node1:~$ ifconfig eth1
eth1      Link encap:Ethernet  HWaddr 08:00:27:51:52:b4
            inet addr:192.168.3.33  Bcast:192.168.3.255  Mask:255.255.255.0
            inet6 addr: fe80::a00:27ff:fe51:52b4/64 Scope:Link
            UP BROADCAST RUNNING MULTICAST  MTU:1500  Metric:1
            RX packets:73 errors:0 dropped:0 overruns:0 frame:0


            TX packets:91 errors:0 dropped:0 overruns:0 carrier:0
            collisions:0 txqueuelen:1000
            RX bytes:33315 (33.3 KB)  TX bytes:15525 (15.5 KB)
Further examples of setting IP addresses, including updating the routing table, are given in Chapter 10.
Video: ifconfig for Viewing and Setting IP Address in Linux (8 min; Apr 2018)
9.4 Viewing Ethernet Interface Details
ifconfig shows summary information for your different network interfaces. If you want to see more details of your Ethernet (wired LAN) interfaces you can use ethtool. This shows information such as data rates supported, current data rate in use and whether the link is up or not. It also allows you to set parameters, such as whether or not the NIC will perform some operations that normally would be performed by the OS.
To view information about a specific Ethernet interface, such as eth0:
$ ethtool eth0
Some of the values to look at if your link is not working as expected include: Link Detected, Speed and Duplex. If the link is not detected it suggests the cable is not plugged in correctly or there is a problem with the hardware. If the link is detected but the speed and duplex are not as expected (e.g. they are 10 Mb/s and Half-Duplex) it may mean a problem with the cable or NIC.
Note: ethtool and virtnet
In virtualised guests, e.g. using virtnet or VirtualBox, there is of course no physical NIC. The
virtualisation software creates a virtual NIC that the guest operating system, and therefore
ethtool, sees. Depending on the virtualisation setup, this virtual NIC may be entirely in
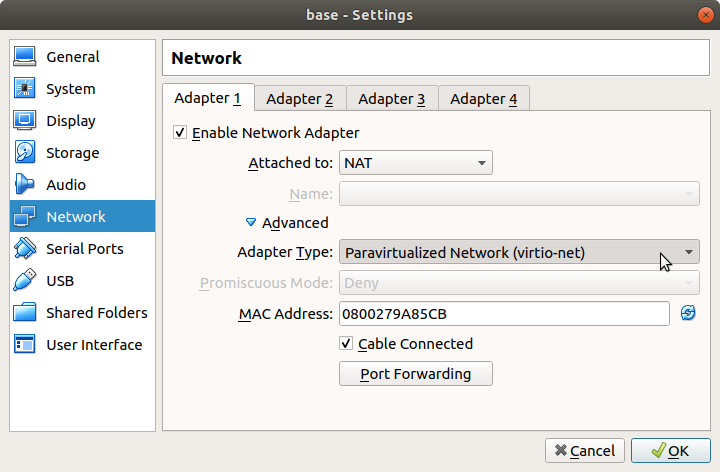
software or it may be based on the real physical NIC in your computer. VirtualBox supports
several different software-based virtual NICs, as seen by the Network settings in
Figure 9.1.
As a virtual NIC is used, the output of ethtool may not be so useful, as it shows most information as “Not reported” or “Unknown”. There is not much you can do about this and highlights a limitation of virtualisation for study: the real hardware details are hidden.
Normally the default values are appropriate. However you may manually set values using the -s option:
$ sudo ethtool -s eth0 speed 100 duplex full
But note that other settings may impact on whether or not your desired settings are used (for example, with Auto-negotation turned on, the link speed will be negotiated by the two end points).
Sometimes operations on packets that are typically performed by the operating system, such as checking checksums and segmenting packets, are offloaded to the NIC. The reason is that the NIC can perform these operations much faster than the OS, increasing the data transfer performance. However when such offloading is performed it may create confusion for students when capturing packets: conceptually we think the operating system segments packets and we would see the individual segments in Wireshark; but with offloading the segments are not seen because they are performed in the NIC hardware (which tcpdump/Wireshark cannot see). Therefore it may be beneficial to turn off such features in a lab.
To view the offloaded features:
$ ethtool -k eth0
To turn offloading features on/off:
$ sudo ethtool -K eth0 gso off
See the man page for ethtool to see the list of features and their short names (e.g. gso means generic-segmentation-offload).
An example on a real interface (not using virtnet):
sgordon@laptop:~$ ethtool enp0s31f6
Settings for enp0s31f6:
  Supported ports: [ TP ]
  Supported link modes:   10baseT/Half 10baseT/Full
                               100baseT/Half 100baseT/Full
                               1000baseT/Full
  Supported pause frame use: No
  Supports auto-negotiation: Yes
  Supported FEC modes: Not reported
  Advertised link modes:  10baseT/Half 10baseT/Full
                               100baseT/Half 100baseT/Full
                               1000baseT/Full
  Advertised pause frame use: No
  Advertised auto-negotiation: Yes
  Advertised FEC modes: Not reported
  Speed: 100Mb/s
  Duplex: Full
  Port: Twisted Pair


  PHYAD: 1
  Transceiver: internal
  Auto-negotiation: on
  MDI-X: on (auto)
Cannot get wake-on-lan settings: Operation not permitted
  Current message level: 0x00000007 (7)
               drv probe link
  Link detected: yes
Video: Linux Networking: ifconfig, ethtool and netstat (12 min; Aug 2016)
9.5 Testing Network Connectivity
A basic task for diagnosing the connectivity of a network is to test whether one computer can communicate with another. This is normally performed using the Internet Control Message Protocol (ICMP). A user application that implements ICMP for testing connectivity is ping.
ping sends a message from your computer to some destination computer, which then immediately responds. ping measures the time it takes from sending the message, to when the response is received. That is, the delay to the destination and back, i.e. the Round Trip Time (RTT).
The simplest way to use ping is to specify the destination as the first parameter:
$ ping DESTINATION
where DESTINATION is the IP address or domain name of the computer you want to test connectivity with.
You can stop the ping by pressing Ctrl-C, or you can limit the number of messages sent by ping to COUNT messages using the -c parameter:
$ ping -c COUNT DESTINATION
There are other useful options for ping: read the manual!
An example of pinging inside virtnet is below. The first ping is from node1 to node2 with a count of 3 pings. By default, a new message is sent every 1 second, and as a response is received a line of the results is printed. For example, the first result contains icmp_seq of 1 and the RTT was 2.83 ms. After the 3 packets summary statistics are displayed, e.g. showing the average RTT of 2.689 ms. The second ping from the example is from node1 to node3, this time with an interval of 2 seconds and data size of 100 Bytes.
network@node1:~$ ping -c 3 192.168.1.1
PING 192.168.1.1 (192.168.1.1) 56(84) bytes of data.
64 bytes from 192.168.1.1: icmp_seq=1 ttl=64 time=2.83 ms
64 bytes from 192.168.1.1: icmp_seq=2 ttl=64 time=3.14 ms


64 bytes from 192.168.1.1: icmp_seq=3 ttl=64 time=2.08 ms

--- 192.168.1.1 ping statistics ---
3 packets transmitted, 3 received, 0% packet loss, time 2004ms
rtt min/avg/max/mdev = 2.084/2.689/3.149/0.450 ms
network@node1:~$ ping -c 4 -i 2 -s 100 192.168.2.21
PING 192.168.2.21 (192.168.2.21) 100(128) bytes of data.
108 bytes from 192.168.2.21: icmp_seq=1 ttl=63 time=3.54 ms
108 bytes from 192.168.2.21: icmp_seq=2 ttl=63 time=3.71 ms
108 bytes from 192.168.2.21: icmp_seq=3 ttl=63 time=3.83 ms
108 bytes from 192.168.2.21: icmp_seq=4 ttl=63 time=4.88 ms

--- 192.168.2.21 ping statistics ---
4 packets transmitted, 4 received, 0% packet loss, time 6008ms
rtt min/avg/max/mdev = 3.548/3.994/4.881/0.527 ms
Video: ping for Network Connectivity Testing in Linux (6 min; Apr 2018)
9.6 Testing a Route
Another useful network connectivity test is to determine the path (or route) that a message takes. That is, what routers does the message pass via on the way to the destination. As with ping, ICMP messages are sent to determine this. An application that implements this in Ubuntu is tracepath1 . Like ping, an ICMP message is sent to the destination and returned, but with tracepath the set of routers along the way also send a response to the source.
The tracepath application can be used by giving a destination IP address or domain name as a parameter:
$ tracepath DESTINATION
tracepath relies on intermediate routers in a path to respond to ICMP (or in some cases, UDP) messages. Not all routers in the Internet are configured to respond—some ignore the packets sent by tracepath. Therefore you may sometimes see “no reply” or see tracepath pause. There is not much you can do about this, other then gain some information from the routers that do reply.
First an example from within virtnet, tracing the path from node1 to node3. Note that a DNS lookup has occurred (see Section 9.7, as the destination of 192.168.2.21 is shown as www.myuni.edu (in virtnet, this fake domain is allocated to the IP 192.168.2.21).
network@node1:~$ tracepath 192.168.2.21


 1?: [LOCALHOST]                                         pmtu 1500
 1:  192.168.1.1                                           1.662ms
 1:  192.168.1.1                                           0.953ms
 2:  www.myuni.edu                                         1.893ms reached
      Resume: pmtu 1500 hops 2 back 2
And an example from a real Linux computer, where no replies are received after the 8th router (and the command is cancelled with Ctrl-C):
sgordon@laptop:~$ tracepath www.australia.gov.au
 1?: [LOCALHOST]                      pmtu 1500
 1:  stafftestnet-gw.cqu.edu.au                            2.594ms
 1:  stafftestnet-gw.cqu.edu.au                            2.056ms
 2:  cns-gw.cqu.edu.au                                     1.694ms
 3:  rock087-wan-sun100.cqu.edu.au                        16.457ms
 4:  core-rok87wan-p2p.cqu.edu.au                         16.729ms
 5:  rok-fire-internet.cqu.edu.au                         19.629ms
 6:  rok019-border.cqu.edu.au                             19.599ms
 7:  xe-5-0-6-205.pe1.fvly.qld.aarnet.net.au              27.868ms
 8:  xe-0-0-3.bdr1.gdpt.qld.aarnet.net.au                 27.950ms
 9:  no reply
10:  no reply
^C
9.7 Converting Between Domain Names and IP Addresses
The DNS is used for mapping domain names (user-friendly addresses) into IP addresses (computer-readable addreses). It is also possible to do the opposite, often referred to as reverse DNS: map IP addresses to the corresponding domain name.
There are several tools for using DNS (or reverse DNS) in Linux, all using slightly different approaches, and producing different output. In this section we will use one of the simpler/older tools, nslookup. The other tools are called dig and host—you can try them yourself to see the difference. The basic use of the tools work in the same way: give a domain name as a parameter, and the corresponding IP address will be returned; or give an IP address as a parameter, and the corresponding domain name will be returned.
$ nslookup DOMAIN      # returns IP address
$ nslookup IPADDRESS   # returns domain name
By default, nslookup will try to first use your local DNS server to retrieve the information. How do you know what your local DNS server is? On Ubuntu, the IP address of one or more local DNS servers are stored in the file /etc/resolv.conf. Note however this file may be automatically generated, meaning the contents may change over time. Consider the output of the following resolv.conf file:
$ cat /etc/resolv.conf
nameserver 10.10.10.9
nameserver 192.168.20.103
In this example there are two local DNS servers configured. They have IP addresses 10.10.10.9 and 192.168.20.103. Requests will be sent to the first DNS server, and if no response, then the second will be tried. View your /etc/resolv.conf to know your local DNS server.
If you want to retrieve the information from a specific DNS server then you need to give an additional option:
$ nslookup DOMAIN DNSSERVER
Note that Linux typically uses (at least) two naming services: the common Internet naming service DNS, as well as a simple file that lists a set of names and corresponding addresses. This is called the /etc/hosts file. See Section 9.11 for further information.
The following are examples of DNS lookups on node1 in virtnet. Note that the lookups are for real Internet servers (outside of virtnet): recall although node1 is a virtual machine it still has normal Internet access.
First, the local DNS server is identifed as 10.0.2.3. In virtnet, VirtualBox implements a DNS server that listens at this address.
network@node1:~$ cat /etc/resolv.conf
# Dynamic resolv.conf(5) file for glibc resolver(3) generated by resolvconf(8)
#     DO NOT EDIT THIS FILE BY HAND -- YOUR CHANGES WILL BE OVERWRITTEN
nameserver 10.0.2.3
Now perform a DNS lookup using the local DNS server. The first two lines identify the DNS server that provided the answer. The answer provides the address of 151.101.98.217 on the last line. However we also see www.australia.gov.au is an alias, with the real/canonical name being b2.shared.global.fastly.net.
network@node1:~$ nslookup www.australia.gov.au
Server:    10.0.2.3
Address:  10.0.2.3#53

Non-authoritative answer:
www.australia.gov.au  canonical name = b2.shared.global.fastly.net.
Name:  b2.shared.global.fastly.net
Address: 151.101.98.217
An example of a reverse DNS lookup, where the IP address is known, follows.
network@node1:~$ nslookup 103.3.63.107
Server:    10.0.2.3
Address:  10.0.2.3#53


Non-authoritative answer:
107.63.3.103.in-addr.arpa  name = sandilands.info.

Authoritative answers can be found from:
Video: nslookup for Domain Name Lookups in Linux (7 min; Apr 2018)
9.8 Viewing the Routing Table
IP uses a routing table to determine where to send datagrams. This applies to end hosts (like PCs), as well as routers, however a routing table on a host is typically quite simple, since all packets are often sent to a local (default) router.
You can view your routing table using the route command:
$ route -n
Note: -n Numeric Option in Linux Commands
Many networking-related commands in Linux include a -n option. When used, addresses are
shown in their numeric form, rather than human-friendly form. For example, with the -n
option, route will show IP addresses. However the default is to try to displayed domain/host
names rather than IP addresses.
You are recommended to use the -n option when it is supported as sometimes the non-numeric information can be misleading. It may even be slower to run the command without the -n option since DNS lookups may be required. Some commands that support -n are: ping, tracepath, route, arp, tcpdump, netstat.
By default, route shows the main routing table. However, the operating system also maintains a cache of routing entries, which are based on where previous packets have been sent. When IP has a packet to send, it first checks the routing cache for an entry, and then (if no entry exists in the cache) uses the main routing table. You can view the routing cache using the -C option:
$ route -n -C
The routing cache shows the Gateway used for particular Source and Destination pairs.
In Chapter 10 we will use route to modify the routing tables (like adding a new route).
Now consider example output of the route command on node1 in virtnet:
network@node1:~$ route -n


Kernel IP routing table
Destination     Gateway         Genmask         Flags Metric Ref    Use Iface
0.0.0.0         10.0.2.2        0.0.0.0         UG    0      0        0 eth0
10.0.2.0        0.0.0.0         255.255.255.0   U     0      0        0 eth0
192.168.0.0     192.168.1.1     255.255.0.0     UG    0      0        0 eth1
192.168.1.0     0.0.0.0         255.255.255.0   U     0      0        0 eth1
There are eight columns and four rows (entries). We will focus on the first two columns and the last (Iface). The Genmask column can be read with the destination; see the man page for a description of the full table.
First some terminology. Gateway means the same as router. In the Gateway column, an IP address of 0.0.0.0 is a special case meaning there is no router. A simple way to read the table is: “to reach the Destination, send to the Gateway/Router using the specified I(nter)face”. While IP uses longest-prefix matching, in this small table it is easiest to understand by reading from the last row upwards. As a result, the table specifies the following:
- To reach network 192.168.1.0/24, send direct (not via a router) using interface eth1.
- To reach network 192.168.0.0/16 (except 192.168.1.0), send to router with IP 192.168.1.1 using interface eth1.
- To reach network 10.0.2.0, send direct using interface eth0.
- To reach any other network, send to router 10.0.2.2 using interface eth0.
Video: route for Viewing Routing Tables in Linux (18 min; Apr 2018)
9.9 Converting IP Addresses to Hardware Addresses
Remember that IP addresses are logical addresses. For a computer to send data to another computer on the same LAN/WAN they must use hardware (or MAC) addresses. For example, if computer A wants to send an IP datagram to computer B (on the same network as A) with IP address 192.168.1.3, then computer A must know the hardware address of computer B. Hence, the ARP is used to find the corresponding hardware addresses for a given IP address.
Although we don’t yet cover in detail how ARP works, we can view the information ARP has in your computer using the application arp. Running arp will return a table (called the ARP table or ARP cache) of IP addresses and corresponding hardware addresses that your computer currently knows about:
$ arp -n
ARP automatically updates the table with new entries for you. However, you can also use arp to delete entries from your ARP table and manually add new entries. See the man page for the syntax.
A quick example of ARP on virtnet:
network@node1:~$ arp -n
Address              HWtype  HWaddress           Flags Mask       Iface
192.168.1.1          ether   08:00:27:10:28:7d   C                eth1
10.0.2.2             ether   52:54:00:12:35:02   C                eth0
10.0.2.3             ether   52:54:00:12:35:03   C                eth0
We see node1 is currently aware of three IP addresses (and their corresponding hardware addresses), and the interface to reach them on.
Video: arp for Showing Address Resolution Table in Linux (6 min; Apr 2018)
9.10 Network Statistics
A tool that allows you to view many different network statistics is netstat. For example, you can view interface statistics (similar to ifconfig), routing table statistics (same as route), connection statistics and TCP/IP packet statistics. Lets look at how to view the last two. netstat is actually a multi-tool and you choose the information you want with one of the many options. We will show a few examples in the following, all on node1 in virtnet.
First, you can view the active TCP connections, which in this example shows node1 (local address) having recent TCP connections to three other applications (foreign address). The ports (:80, :22 and :80, respectively) indicate the likely applications: SSH for port 22 and web browsing for port 80.
network@node1:~$ netstat -t -n
Active Internet connections (w/o servers)
Proto Recv-Q Send-Q Local Address           Foreign Address     State
tcp        0      0 192.168.1.11:38020      192.168.2.21:80     TIME_WAIT
tcp        0     36 10.0.2.15:22            10.0.2.2:41928      ESTABLISHED
tcp        0      0 192.168.1.11:38018      192.168.2.21:80     TIME_WAIT
You can also view summary TCP/IP statistics:, such as packet sent/received by different protocols.
network@node1:~$ netstat -s
Ip:
     2318 total packets received
     2 with invalid addresses
     0 forwarded
     0 incoming packets discarded
     2316 incoming packets delivered
     1495 requests sent out
Icmp:
     10 ICMP messages received
     0 input ICMP message failed.
     ICMP input histogram:
         destination unreachable: 1
         timeout in transit: 2
         echo replies: 7
     7 ICMP messages sent
     0 ICMP messages failed
     ICMP output histogram:
         echo request: 7
IcmpMsg:
         InType0: 7
         InType3: 1
         InType11: 2
         OutType8: 7
Tcp:
     5 active connections openings
     2 passive connection openings
...
IpExt:
     InOctets: 165601
     OutOctets: 177667
     InNoECTPkts: 2351
Explore the netstat man page to see other options and explanation of the output.
Video: netstat for Network Information in Linux (5 min; Apr 2018)
9.11 Useful Networking Files
Some additional networking information about your computer can be found in various files on your computer. An important directory that contains a lot of configuration details for your operating system is the /etc directory. Some useful files are listed in this section. The examples are taken from node1 in virtnet. In some cases the file contents are edited (lines deleted) for brevity.
9.11.1 /etc/hostname
The hostname file stores the name of this computer or host.
node1
9.11.2 /etc/hosts
The hosts file allows the system administrator to specify a list of local domain names and corresponding IP addresses. This is used in addition to DNS, however the mappings given in the file are local to this computer (whereas DNS servers storing mappings can be consulted by many computers). Normally the hosts file is used to give a name to this computer, as indicated on the first two lines in the example. It can also be used to map domains to chosen IP addresses. This is useful for setting up test domains in a local network (lines 10 to 12 are the fake domains used for demonstration web servers in virtnet), or redirecting applications accessing a specific domain to a server different than what DNS returns.
127.0.0.1  localhost
127.0.1.1  node1

# The following lines are desirable for IPv6 capable hosts
::1     localhost ip6-localhost ip6-loopback
ff02::1 ip6-allnodes
ff02::2 ip6-allrouters

# Used for website demos
192.168.2.21  www.myuni.edu
192.168.2.22  www.freestuff.com
192.168.2.22  www.myuni.edu.gr
Video: /etc/hosts for Local Domains in Linux (8 min; Apr 2018)
9.11.3 /etc/resolv.conf
The resolv.conf file lists the local DNS servers that your computer will use. Multiple name servers can be listed, one per line. Note that the entries may be generated in soem cases. See the following man pages: man resolv.conf and man resolvconf, noting the second is for software (no dot after resolv).
# Dynamic resolv.conf(5) file for glibc resolver(3) generated by resolvconf(8)
#     DO NOT EDIT THIS FILE BY HAND -- YOUR CHANGES WILL BE OVERWRITTEN
nameserver 10.0.2.3
9.11.4 /etc/network/interfaces
The interfaces file can be used to configure the different network interfaces (NICs) on your computer, especially allocating IP addresses (and related information). When your computer boots, two common methods in which a NIC obtains an IP address are:
- static
- The address details are set in this file.
- dhcp
- A Dynamic Host Configuration Protocol (DHCP) client contacts a DHCP server to obtain and set the address details.
loopback is also used for special software interfaces for sending to oneself, and manual is also available for requiring the user to setup later.
In virtnet nodes, usually interface eth0 uses DHCP, obtaining an IP address from the VirtualBox DHCP server. Then eth1 (and above) have static addresses assigned to implement the desired network topology.
In the following example, eth1 has two special options post-up and pre-down. These are used to add and delete a route to other subnets inside virtnet when after the interface is brought up and before the interface is brought down, respectively.
# This file describes the network interfaces available on your system
# and how to activate them. For more information, see interfaces(5).

# The loopback network interface
auto lo
iface lo inet loopback

auto eth0
iface eth0 inet dhcp

# VBoxNetwork: neta
auto eth1
iface eth1 inet static


  address 192.168.1.11
  netmask 255.255.255.0
  network 192.168.1.0
  broadcast 192.168.1.255
  post-up route add -net 192.168.0.0 netmask 255.255.0.0 gw 192.168.1.1 dev eth1
  pre-down route del -net 192.168.0.0 netmask 255.255.0.0 gw 192.168.1.1 dev eth1

...
9.11.5 /etc/services
The services file lists transport layer port numbers and their associated named services. This is useful if you need to remember a port number, or if you write software that needs to map service names to port numbers. Appendix A lists some common ports, while IANA maintain the official Service Name and Transport Protocol Port Number Registry.
...
tcpmux          1/tcp                           # TCP port service multiplexer
echo            7/tcp
echo            7/udp
discard         9/tcp           sink null
discard         9/udp           sink null
systat          11/tcp          users
daytime         13/tcp
daytime         13/udp
netstat         15/tcp
qotd            17/tcp          quote
msp             18/tcp                          # message send protocol
msp             18/udp
chargen         19/tcp          ttytst source
chargen         19/udp          ttytst source
ftp-data        20/tcp
ftp             21/tcp
fsp             21/udp          fspd
ssh             22/tcp                          # SSH Remote Login Protocol
ssh             22/udp
telnet          23/tcp
smtp            25/tcp          mail
...
9.11.6 /etc/protocols
The protocols file lists network layer protocol numbers and their associated transport layer names. This is useful if you need to remember a protocol number, or if you write software that needs to map transport/routing protocols to protocol numbers. Appendix A lists some common protocol numbers, while IANA maintain the official list of Protocol Numbers.
...
ip      0       IP              # internet protocol, pseudo protocol number
hopopt  0       HOPOPT          # IPv6 Hop-by-Hop Option [RFC1883]
icmp    1       ICMP            # internet control message protocol
igmp    2       IGMP            # Internet Group Management
ggp     3       GGP             # gateway-gateway protocol
ipencap 4       IP-ENCAP        # IP encapsulated in IP (officially ``IP'')
st      5       ST              # ST datagram mode
tcp     6       TCP             # transmission control protocol
egp     8       EGP             # exterior gateway protocol
igp     9       IGP             # any private interior gateway (Cisco)
pup     12      PUP             # PARC universal packet protocol
udp     17      UDP             # user datagram protocol
hmp     20      HMP             # host monitoring protocol
xns-idp 22      XNS-IDP         # Xerox NS IDP
rdp     27      RDP             # "reliable datagram" protocol
iso-tp4 29      ISO-TP4         # ISO Transport Protocol class 4 [RFC905]
dccp    33      DCCP            # Datagram Congestion Control Prot. [RFC4340]
xtp     36      XTP             # Xpress Transfer Protocol
ddp     37      DDP             # Datagram Delivery Protocol
idpr-cmtp 38    IDPR-CMTP       # IDPR Control Message Transport
ipv6    41      IPv6            # Internet Protocol, version 6
ipv6-route 43   IPv6-Route      # Routing Header for IPv6
ipv6-frag 44    IPv6-Frag       # Fragment Header for IPv6
...
9.11.7 /etc/sysctl.conf
The sysctl.conf file stores system variables for the Linux kernel. The user can add variables and values to change them from the default values chosen upon boot. For networking, variables start with net. For example, to enable packet forwarding, turning your host into a router, you can uncomment the variable net.ipv4.ip_forward, making sure the value is 1. Chapter 10 demonstrates setting up a router in Linux.
There is also the sysctl command, which allows interactive viewing and setting of variables. To view all variables and their current values:
$ sysctl -a
See man sysctl.conf and man sysctl for further information.
#
# /etc/sysctl.conf - Configuration file for setting system variables
# See /etc/sysctl.d/ for additional system variables.
# See sysctl.conf (5) for information.
#

#kernel.domainname = example.com

# Uncomment the following to stop low-level messages on console
#kernel.printk = 3 4 1 3

##############################################################3
# Functions previously found in netbase
#

# Uncomment the next two lines to enable Spoof protection (reverse-path filter)
# Turn on Source Address Verification in all interfaces to
# prevent some spoofing attacks
#net.ipv4.conf.default.rp_filter=1
#net.ipv4.conf.all.rp_filter=1

# Uncomment the next line to enable TCP/IP SYN cookies
# See http://lwn.net/Articles/277146/
# Note: This may impact IPv6 TCP sessions too
#net.ipv4.tcp_syncookies=1

# Uncomment the next line to enable packet forwarding for IPv4
#net.ipv4.ip_forward=1

# Uncomment the next line to enable packet forwarding for IPv6
#  Enabling this option disables Stateless Address Autoconfiguration
#  based on Router Advertisements for this host
#net.ipv6.conf.all.forwarding=1
...
9.12 Application and Performance Testing
To be completed. Follow the links or view the videos to see information about each tool.
9.12.1 Generic Application Testing with netcat
Netcat, or nc for short, is a command that allows client/server communications using TCP or UDP. That is, nc can be used to start a server listening on a chosen port, and then nc can be used on another computer to act as a client that connects to that server. Data can be sent in both directions between client and server using the chosen transport protocol. The data is sent in the payload of the TCP or UDP packet—there is no application protocol used. The data is read from the command line, so that once the client and server are both running, one user can type in a message, press ENTER, and that message will be sent to the corresponding user and displayed on the screen.
nc is allows creation of a simply messaging application, where two users on different computers can send text messages to each other. Using pipes and redirection, this can be extended to send files to each other. However nc is not very user friendly for such purposes—you are recommended to use a dedicated application if you really want messaging or file transfer. The real benefit of nc comes in testing, with two scenarios commonly used:
- To test that one computer can communicate with another via TCP and/or UDP, start a nc server and nc client on each computer, then send messages.
- To test an existing server (e.g. a web server) can be reached, use nc as a client only, pretending to act as the real client (e.g. web browser). This is useful of if the client is not available on your system, or you don’t want to start the client (e.g. within a script).
These scenarios are useful for testing firewalls: the server can listen on any port, and you can try to connect via the client to determine if your firewall rules are working (i.e. allow or block the connection).
Let’s show how to use nc first using TCP as the transport protocol (which is the default). The demonstrations are performed on virtnet topology 5, with the client running on node1 and the server on node3.
First we must start the server, specifying the port to listen on. You may generally select any unused port (although if you use a port lower than 1024, then you will need to precede the nc command with sudo). In this demo, the selected port is 12345.
network@node3:~$ nc -l 12345
The server will wait for communications from the client.
Now on node1 we will start the client. We must specify the IP address and port of the server. In this demo, node3 has IP 192.168.2.21 and the port is that used above.
network@node1:~$ nc 192.168.2.21 12345
The client is now waiting for user input. If you type in a message on the client, say hello, then that should be displayed on the server.
network@node1:~$ nc 192.168.2.21 12345
hello
Similarly, you can type a message on the server and it should be displayed on the client.
network@node3:~$ nc -l 12345
hello
bye
To gracefully close a connection, press Ctrl-D at either client or server. Ctrl-C will also work.
Now you have a simply messaging application, and more importantly, a tool to test a network with TCP traffic.
Video: Netcat and TCP in a Virtual Linux Network (19 min; Feb 2017)
nc also supports UDP. You must use the -u option at both client and server. On the server (node3):
network@node3:~$ nc -u -l 12345
And on the client (node1):
network@node1:~$ nc -u 192.168.2.21 12345
You can now send data in UDP packets between client and server. Note that as UDP is not connection-oriented, you will need to use Ctrl-C on both sides to stop the client and server.
Video: Netcat and UDP in a Virtual Linux Network (14 min; Feb 2017)
9.12.2 Traffic Monitoring with iptraf
iptraf is an interactive tool to monitor traffic through a computer. To install:
$ sudo apt install iptraf
To run you must use sudo:
$ sudo iptraf
Explore the user interface using your arrow keys. More information to be added in the future.
9.12.3 Internet Performance Measurements with iperf
iperf is a client/server program that allows you to measure the performance of a network, in particular, TCP and UDP throughput. iperf is free software to download, available for Linux and Windows operating systems. To use iperf you run one copy as a server (which waits for connections/data) and another as a client (which initiates sending data). At the end of the data transfer the server reports the statistics (throughput, packet loss, delay) back to the client. Data transfer can be performed with either TCP or UDP.
Network Configuration
For the following demonstrations, iperf was run on a real network, not using virtnet. While virtnet is useful for general networking, as data is transferred between nodes via the host memory (rather than switches and cables), the performance achieved using virtnet does not emulate that used in real networks. In short, using iperf in virtnet is not very useful for measuring performance.
The following examples were performed on a 100Mb/s switched Fast Ethernet network. That is, the iperf client was running on a Pentium III 933MHz (with Ubuntu 8.04) and the server on a Pentium D 2.8GHz (also Ubuntu 8.04). The two computers were connected via switch (ZyXel ADSL Modem/Router/Switch) using Cat5 cabling. The IP address of the client is 192.168.1.3 and the server 192.168.1.2.
While the examples are from an old setup (about 2009), the same commands can be applied today (but the performance results will differ on your network).
You may need to install iperf on both client and server computer. On Linux:
$ sudo apt install iperf
You can also obtain iperf for other operating systems, and have the client and server running on different operating systems.
The following tests were all performed using iperf version 2. iperf3 is substantially different.
UDP Performance
Let’s first consider the performance of UDP over the simple test network. On the server run:
server@192.168.1.2:~$ iperf --server --udp
Note that the options --server and --udp have shorter versions, -s and -u, respectively. I am using the longer version for ease of readability; you may use the shorter versions for ease of typing.
Now start the test on the client. In this test we will send UDP data at 100Mb/s for 10 seconds:
client@192.168.1.3:~$ iperf --client 192.168.1.2 --udp --time 10 --bandwidth 100M
When the test is completed the output from the server looks like this:
------------------------------------------------------------
Server listening on UDP port 5001
Receiving 1470 byte datagrams
UDP buffer size:   109 KByte (default)
------------------------------------------------------------
[  3] local 192.168.1.2 port 5001 connected with 192.168.1.3 port 39253
[  3]  0.0-10.0 sec    114 MBytes  95.7 Mbits/sec  0.013 ms    0/81435 (0%)
[  3]  0.0-10.0 sec  1 datagrams received out-of-order
while the output from the client is:
------------------------------------------------------------
Client connecting to 192.168.1.2, UDP port 5001
Sending 1470 byte datagrams
UDP buffer size:   108 KByte (default)
------------------------------------------------------------
[  3] local 192.168.1.3 port 39253 connected with 192.168.1.2 port 5001
[  3]  0.0-10.0 sec    114 MBytes  95.8 Mbits/sec
[  3] Sent 81436 datagrams
[  3] Server Report:
[  3]  0.0-10.0 sec    114 MBytes  95.7 Mbits/sec  0.013 ms    0/81435 (0%)
[  3]  0.0-10.0 sec  1 datagrams received out-of-order
The Server Report gives us the most useful information: throughput of 95.7Mb/s, delay of 0.013ms and 0% packet loss. Note also the default parameters such as the datagram size (1470 bytes) and the buffer size (108 KBytes).
You can run further tests by starting the client again—the server remains running until you close it (e.g. Control-C). To look at details of the packets you could use packet capture software such as Wireshark or tcpdump to record the packets (see Chapter 11). For example, tcpdump can be used to capture all packets, e.g.:
client@192.168.1.3:~$ tcpdump -i eth1 -w file.pcap
The above will capture all packets on interface eth1 and save them in file.pcap. If you only want to capture packets belong to iperf (assuming there is other traffic on the network) you can specify a filter (e.g. based on the port number):
client@192.168.1.3:~$ tcpdump 'port 5001' -i eth1 -w file.pcap
A text summary output of the packets can be printed to the screen by omitting the -w option. Alternatively, you can read the .pcap file into tcpdump (e.g. tcpdump -r file.pcap) or load it into Wireshark. (Of course, you can just use Wireshark to perform the capture, but tcpdump is sometimes useful when you only have/want command-line access).
For the example capture presented above (with throughput of 95.7Mb/s) I loaded the captured packets into Wireshark. Looking at the Summary Statistics tells us that the average packet size is 1512 bytes and the average traffic is 98.365Mb/s. Does this make sense? Remember Wireshark is reporting the size of the entire frame (payload plus UDP header (8 bytes) plus IP header (20 bytes) plus Ethernet header (14 bytes)) whereas iperf is reporting results based on the 1470 byte payload in the UDP datagram. The 1470 byte payload is 97.2% of the entire 1512 byte frame. The iperf throughput of 95.7Mb/s is approximately 97.2
So in summary, the UDP payload throughput is 95.7Mb/s whereas the raw Ethernet throughput is 98.365Mb/s. Why not 100Mb/s in Fast Ethernet? Well, the Fast Ethernet standards states that there must be a small Inter Frame Gap (IFG) between frames. In addition, there is a physical layer header (that is not reported by Wireshark). Together these amount to the time to transmit 20 bytes at 100Mb/s (1.6usec). That is, the Ethernet MAC frame is 1512 bytes, but the equivalent of 1532 bytes must be transmitted at 100Mb/s. The best case efficiency of the MAC protocol is thus 1512/1532 = 98.695%. We are measuring 98.365%, which is very close to the best case scenario.
If you run further tests with iperf the performance results may differ slightly (e.g. due to other traffic in the network). You should normally run many tests and look at the average (and other statistics). From five tests that I ran the maximum throughput reported by iperf was 95.7Mb/s, with a delay of 0.013ms (and no packets lost). Now lets compare that TCP.
TCP Performance
The server must be restarted to handle TCP traffic (a protocol option is not needed; by default, iperf uses TCP):
server@192.168.1.2:~$ iperf --server
When running the client we only specific the time, not the sending bandwidth, because the TCP source will try to send as fast as possible:
client@192.168.1.3:~$ iperf --client 192.168.1.2 --time 10
The output from the server is:
------------------------------------------------------------
Server listening on TCP port 5001
TCP window size: 85.3 KByte (default)
------------------------------------------------------------
[  4] local 192.168.1.2 port 5001 connected with 192.168.1.3 port 54939
[  4]  0.0-10.1 sec    113 MBytes  94.1 Mbits/sec
whereas the output from the client is:
------------------------------------------------------------
Client connecting to 192.168.1.2, TCP port 5001
TCP window size: 16.0 KByte (default)
------------------------------------------------------------
[  3] local 192.168.1.3 port 54939 connected with 192.168.1.2 port 5001
[  3]  0.0-10.0 sec    113 MBytes  94.8 Mbits/sec
You need to study the operation of TCP to understand why the throughput of about 94Mbits/sec is less than that achieved when using UDP.
Video: Using iperf to Measure Application Throughput in the Internet (9 min; Jan 2012)
9.12.4 Packet Drops and Delays with tc
For understanding network protocols we often need to create a controlled testing environment. virtnet (Chapter 3) is very useful for this, however has a significant limitation if testing performance: the speed of the “link” between nodes dependent on the host memory/disk speeds and not related to real link speeds (i.e. Ethernet). To overcome this, we can use tools to artificially control the link performance. One such tool is tc, short for traffic control. We can use tc to emulate the following conditions:
- Limit the bandwidth of a link to a value we choose, e.g. to 500 kb/s.
- Introduce delay to packets, e.g. so all packets experience a delay of 3 ms.
- Drop packets to simulate packet loss in a link or network, e.g. so 1% of all packets are dropped.
Controlling bandwidth, delay and packet loss allows us to investigate the operation and performance network protocols is a variety of network conditions.
This section is current incomplete, but to see examples of tc see: