virtnet on Windows
Background
I created virtnet to make it easy to automatically created Linux nodes in VirtualBox, configured into various common network topologies. The main intention was to support teaching: it allows students to quickly create a network topology without knowing too much about VirtualBox or wasting time with repetitve tasks. I created virtnet as a set of Bash shell scripts. In that way running on Linux and OSX hosts was easy, but running on Windows hosts required installation of cygwin. I have had a 100+ students use virtnet in classes successfully on Linux, Windows and OSX hosts.
Moving to CQUniveristy, the lab setup and teaching arrangements is different such that it is difficult to require students to install and configure software on lab computers. Therefore I have created some Windows command scripts, to be used instead of the Bash shell scripts, that can easily be used in Windows only labs. That is, a quick/easy way to run virtnet on Windows hosts. However there are two limitations:
- The Windows command scripts I have created so far only cover 4 topologies. For teaching and demos these topoogies are sufficient. If anyone wants a different topology let me know.
- Once nodes are created by the Windows command script, you have to manually login and run another script in each node to finish the configuration. (This is because Windows doesn't have a builtin SSH client).
Despite the limitations, I think it can be easier to use virtnet on Windows hosts. The following is instructions for getting setup.
Setting Up virtnet on Windows
- Download the base virtual machine base.zip (450MB), and extract/unzip it. Also download the Windows command scripts: vn-topology01.cmd | vn-topology03.cmd | vn-topology05.cmd | vn-topology07.cmd
- Open VirtualBox, and from the "Machine" menu select "Add...". Then browse to the folder of the extracted ZIP and select base.vbox. This should create a virtual machine in VirtualBox called base. Do NOT start the base VM.

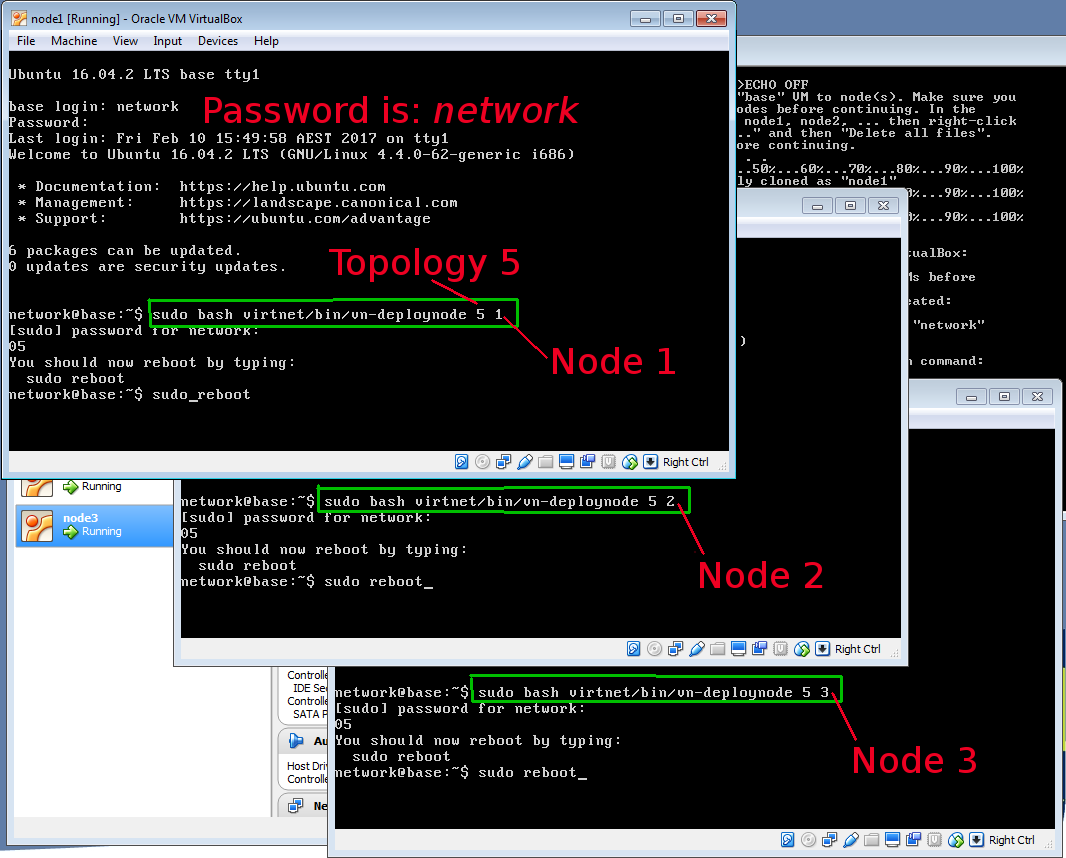
- Double-click on a topology file (e.g. vn-topology05.cmd) and follow the instructions to setup the topology. In short for each node you need to:
- Start the node in VirtualBox
- Login to the node using username network and password network
- Type and run the command:
where x is the topology number (1, 3, 5 or 7) and y is the node number (1, 2, 3, ...).sudo bash virtnet/bin/vn-deploynode x y - Reboot the node with the command:
sudo reboot
The screenshot below is an example for topology 5, which has 3 nodes:
Once all of the nodes have been started, deployed and rebooted, you can start using them.
If you have problems or do not understand the steps, see the 17 minute screencast:
Topologies
Currently four different topologies are provided:
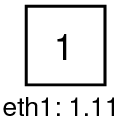
- Topology 01: contains a single Linux node (node1). Can be used for learning Linux command line, passwords, permissions and encryption software.
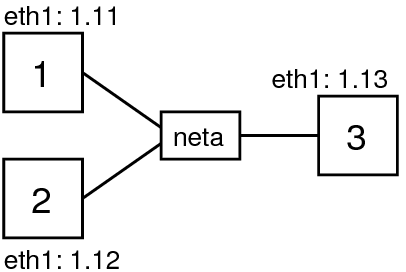
- Topology 03: contains 3 Linux nodes (node1, node2, node3) in the same subnet. Can be used for testing ARP and LAN attacks.
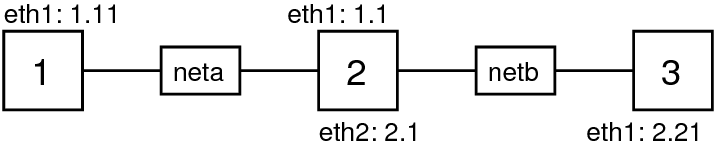
- Topology 05: contains 3 Linux nodes, node1 and node 2 on one subnet, and node2 and node3 on a second subnet. node2 is a router. Can be used for testing packet interception, encryption, firewalls and simple network attacks.
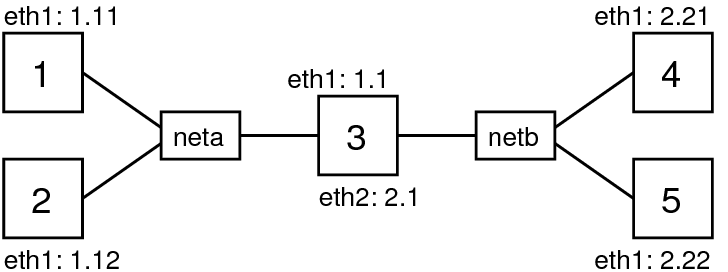
- Topology 07: contains 5 Linux nodes, similar to topology 05 but with an extra host on each subnet. Can be used for testing web application attacks (e.g. CSRF).
You only create one topology at a time. If you want to change topologies, make sure you delete the nodes from VirtualBox before creating the new topology.
Created on Fri, 03 Mar 2017, 9:55am
Last changed on Fri, 03 Mar 2017, 10:36am