Below is some information about the assignment which is in addition to the original instructions.
Some hints on how to use the capture I provided:
For the wireless LAN throughput experiment, I suggest you transfer a large file between a nearby server (e.g on the same LAN as you) and your laptop. One approach is to use a direct wireless link (sometimes called adhoc) from one laptop to another, i.e. no access point, cables or other servers.
Originally task B of the assignment required you to capture traffic on a wireless link while accessing a web page. Although you can do this on almost any computer, to see the details of what happens using the wireless LAN you normally need Linux, and in some cases specific wireless LAN cards/chips.
Rather than ask everyone to find a laptop that can correctly capture, instead I have performed a capture using my laptops and provide you that capture. You can use the capture below to complete Task B. That is, you can load the capture file in Wireshark and complete tasks B2, B4 and B5. Tasks B1 and B3 do not need to be completed (since I've done them for you). Of course, if you want to capture usingyour own computer you may (and should still complete tasks B1 and B3).
I captured all traffic seen by laptop 1 on its wireless LAN interface. The capture file to be loaded into Wireshark: ITS323Y12S1H16-Wireless-LAN-Capture.cap.
While capturing on laptop 1, on laptop 2 I connected to a wireless LAN access point (with SSID its323) and in my browser accessed several web pages. A video of this is available on YouTube. The time in the video is about 1 second behind the time in the capture, e.g. at time 47 seconds in the video when I press Enter to visit the website, the time in the capture is about 48 seconds.
The hardware address of laptop 2 is: 00:26:5e:8e:e4:95. It was assigned an IP address: 192.168.0.104. The hardware address of the access point is: 00:18:e7:8a:44:63.
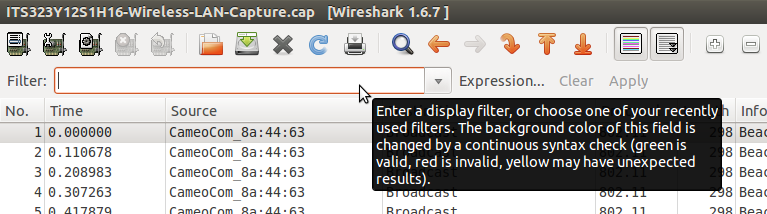
In Wireshark when there are more than 10's of packets captured, finding packets of interest requires search or filtering. Wireshark has a display filter the shows only those packets that match certain conditions. The conditions are written as an expression in the filter box at the top of Wireshark:
Clicking on the Expression... button takes you to a window where you can create the filter.
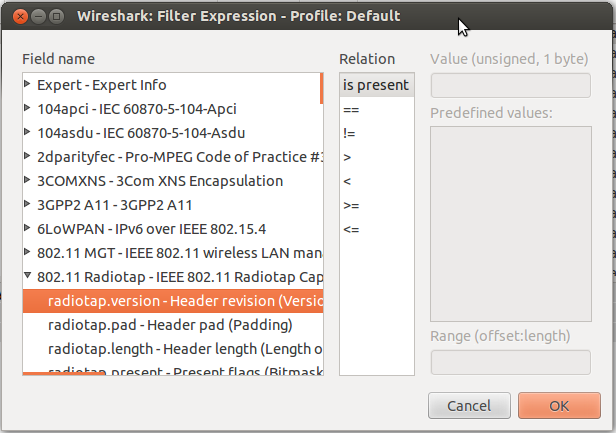
You select the header field or parameter for a specific protocol. If you want to display only packets which have this field present, then select the relation Is present and click ok. But you can be more specific, showing only packets where the field has a particilar (range of) values, using ==, !=, > etc. Once you start to learn the field names you don't need to use the expression editor: instead you can type the expression directly into the display filter box.
There are many protocols to chose from, and for each protocol usually many fields. Finding the field you want is not easy. To get you started, below are some examples of filters that may be useful.
Protocols: http, tcp, ip, arp, ...
Typing the protocol's acronym, in lowercase, will often filter packets using that protocol. Works for http, tcp, ip, arp, icmp, ssl, wlan and many others.
HTTP: http
httpThis finds all packets that use HTTP. You can also find requests only (http.request) or responses only (http.response).
IP Address: ip.addr
ip.addr==192.168.0.104This finds all packets where the source address or destination address match 192.168.0.104. Similarly, you can filter based on source (ip.src) and destination (ip.dst).
WLAN Address: wlan.addr
wlan.addr==00:26:5e:8e:e4:95Finds all packets where the source or destination wireless LAN address matches 00:26:5e:8e:e4:95. Similarly, you can filter based on source address (wlan.sa), destination address (wlan.da), transmitter address (wlan.ta) and receiver address (wlan.ra). Note that for a laptop sending to a computer on a LAN, the destination address will be computers address, while the receiver address will be the WLAN access point (since the laptop sends to the computer via the AP).
WLAN Frame Types: wlan.fc.type and wlan.fc.subtype
Wireless LAN frames are categorised into different types and subtypes. Common frames you will see are listed below (here is a more complete list).
| Frame | Type | Subtype |
|---|---|---|
| Management | 0 | - |
| Association Request | 0 | 0 |
| Association Response | 0 | 1 |
| Reassocation Request | 0 | 2 |
| Reassociation Response | 0 | 3 |
| Probe Request | 0 | 4 |
| Probe Response | 0 | 5 |
| Beacon | 0 | 8 |
| Authentication | 0 | 11 |
| Deauthentication | 0 | 12 |
| Control | 1 | - |
| RTS | 1 | 11 |
| CTS | 1 | 12 |
| ACK | 1 | 13 |
| Data | 2 | - |
| Data | 2 | 0 |
wlan.fc.type==0This displays all management frames, such as frames for discovering, joining and leaving the network.
wlan.fc.type==0 && wlan.fc.subtype==8This displays all the Beacon frames (which are a subset of the management frames).
To login to the IT server you need a SSH client. On Unix/Linux operating systems (e.g. Ubuntu, MacOSX) a SSH client is normally included. Open a terminal and type:
ssh -l u5000000000 it.siit.tu.ac.th
but of course using your username and then supplying your password (same as used for Moodle). If successful you can run commands to view files, change into directories and edit files.
Windows doesn't come with a built-in SSH client. I recommend you download and use PuTTY (select the Windows Installer from the Download page).
You have two options to create your website:
To edit directly on the IT server, once you have logged in you can try the following commands. To list the files and directories in your present working directory:
ls
To change to another directory, for example the public_html directory:
cd public_html
To change back to your home directory (which is /home/students/u5000000000 in my example):
cd
To edit a file, such as index.html in a text editor (called nano):
nano index.html
Press Ctrl-O to save the file and Ctrl-X to exit the editor.
To make a new directory, for example, its323:
mkdir its323
Further basic commands can be found on pages 7, 8 and 9 of the ITS332 Lab Manual. A more detailed introduction is available in the free book by FSF Introduction to Command Line.
If you want to edit files on your computer and then upload them to IT server then you need a SFTP client. For Windows, WinSCP is ok. For cross-platform (Windows, MacOS, Linux) try FileZilla. With either of these installed you can easily connect to the IT server and drag-and-drop files to transfer them to/from the IT server.
You can also use the command line to copy files. Again, Linux/MacOS have scp available, while pscp.exe comes part of the PuTTY install on Windows. The following is an example with scp in a terminal on your computer to copy file mypage.html into the directory /home/students/u5000000000/public_html/its323/ on the IT server:
scp mypage.html u5000000000@it.siit.tu.ac.th:/home/students/u5000000000/public_html/its323/
Similar syntax on Windows, but use pscp.exe instead of scp (you may have to set your PATH variable for this to work - see me if problems).